Quick Start
This page will guide you through the process of using Gitea Actions.
Set up Gitea
First of all, you need a Gitea instance. You can follow the documentation to set up a new instance or upgrade your existing one. It doesn't matter how you install or run Gitea, as long as its version is 1.19.0 or higher.
Since 1.21.0, Actions are enabled by default. If you are using versions before 1.21.0, you need to add the following to the configuration file to enable it:
[actions]
ENABLED=true
If you want to learn more or encounter any problems while configuring it, please refer to the Configuration Cheat Sheet.
Set up runner
Gitea Actions requires Gitea Runner to run the jobs. In order to avoid consuming too many resources and affecting the Gitea instance, it is recommended to start runners on separate machines from the Gitea instance.
You can use the pre-built binaries or the docker images to set up the runner.
Before proceeding any further, we suggest running it as a command line with pre-built binaries to ensure that it works with your environment, especially if you are running a runner on your localhost. And it could be easier to debug if something goes wrong.
The runner can run the jobs in isolated Docker containers, so you need to make sure that the Docker has been installed and Docker daemon is running. While it is not strictly necessary, because the runner can also run the jobs directly on the host, it depends on how you configure it. However, it is recommended to use Docker to run the jobs, because it is more secure and easier to manage.
Before running a runner, you should first register it to your Gitea instance using the following command:
./runner register --no-interactive --instance <instance> --token <token>
There are two arguments required, instance and token.
instance refers to the address of your Gitea instance, like http://192.168.8.8:3000 or https://gitea.com.
The runner and job containers (which are started by the runner to execute jobs) will connect to this address.
This means that it could be different from the ROOT_URL of your Gitea instance, which is configured for web access.
It is always a bad idea to use a loopback address such as 127.0.0.1 or localhost.
If you are unsure which address to use, the LAN address is usually the right choice.
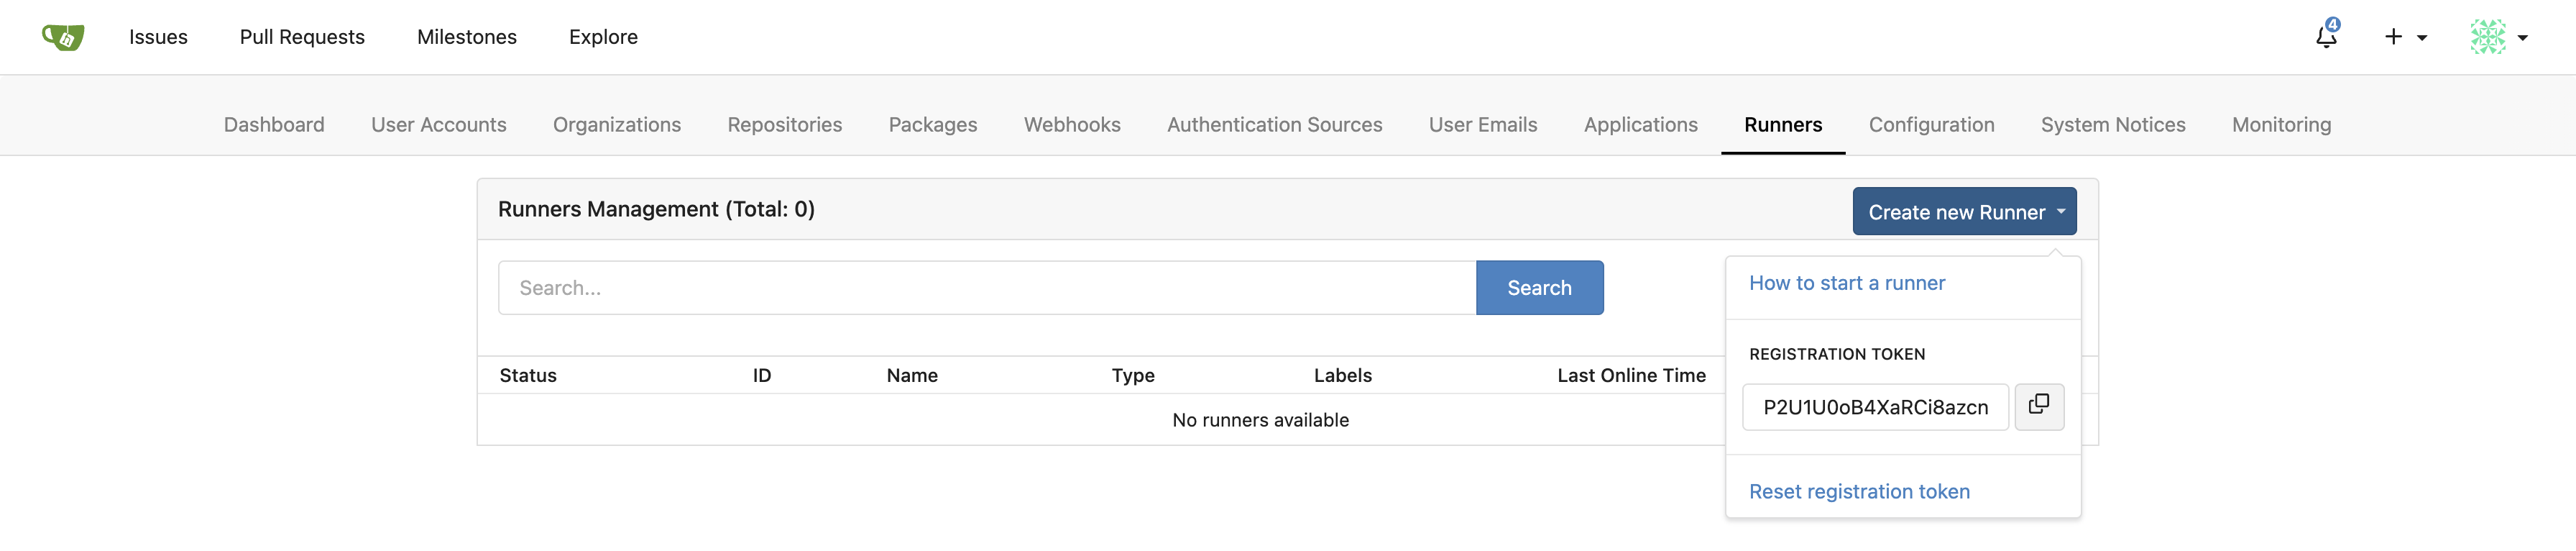
token is used for authentication and identification, such as P2U1U0oB4XaRCi8azcngmPCLbRpUGapalhmddh23.
Each token can be used to create multiple runners, until it is replaced with a new token using the reset link.
You can obtain different levels of 'tokens' from the following places to create the corresponding level of 'runners':
- Instance level: The admin settings page, like
<your_gitea.com>/-/admin/actions/runners. - Organization level: The organization settings page, like
<your_gitea.com>/<org>/settings/actions/runners. - Repository level: The repository settings page, like
<your_gitea.com>/<owner>/<repo>/settings/actions/runners.
After registering, a new file named .runner will appear in the current directory.
This file stores the registration information.
Please do not edit it manually.
If this file is missing or corrupted, you can simply remove it and register again.
Finally, it's time to start the runner:
./runner daemon
And you can see the new runner in the management page:

You can find more information by visiting Gitea Runner.
Use Actions
Even if Actions is enabled for the Gitea instance, repositories still disable Actions by default.
To enable it, go to the settings page of your repository like your_gitea.com/<owner>/repo/settings and enable Enable Repository Actions.

The next steps may be rather complicated. You will need to study the workflow syntax for Actions and write the workflow files you want.
However, we can just start from a simple demo:
name: Gitea Actions Demo
run-name: ${{ gitea.actor }} is testing out Gitea Actions 🚀
on: [push]

jobs:
  Explore-Gitea-Actions:
    runs-on: ubuntu-latest
    steps:
      - run: echo "🎉 The job was automatically triggered by a ${{ gitea.event_name }} event."
      - run: echo "🐧 This job is now running on a ${{ runner.os }} server hosted by Gitea!"
      - run: echo "🔎 The name of your branch is ${{ gitea.ref }} and your repository is ${{ gitea.repository }}."
      - name: Check out repository code
        uses: actions/checkout@v4
      - run: echo "💡 The ${{ gitea.repository }} repository has been cloned to the runner."
      - run: echo "🖥️ The workflow is now ready to test your code on the runner."
      - name: List files in the repository
        run: |
          ls ${{ gitea.workspace }}
      - run: echo "🍏 This job's status is ${{ job.status }}."
Certain actions may not function correctly within SHA256 repositories or when Gitea runs on subpath. This includes actions/checkout.
You can upload it as a file with the extension .yaml in the directory .gitea/workflows/ of the repository, for example .gitea/workflows/demo.yaml.
You might notice that this is fairly similar from the Quickstart for GitHub Actions.
That is because Gitea Actions is designed to be compatible with GitHub Actions wherever possible.
Be careful, the demo file contains some emojis.
Please make sure your database supports them, especially when using MySQL.
If the charset is not utf8mb4, errors will occur, such as Error 1366 (HY000): Incorrect string value: '\\xF0\\x9F\\x8E\\x89 T...' for column 'name' at row 1.
See Database Preparation for more information.
Alternatively, you can remove all emojis from the demo file and try again.
The line on: [push] indicates that the workflow will be triggered when you push commits to this repository.
However, when you upload the YAML file, it also pushes a commit, so you should see a new task in the Actions tab.
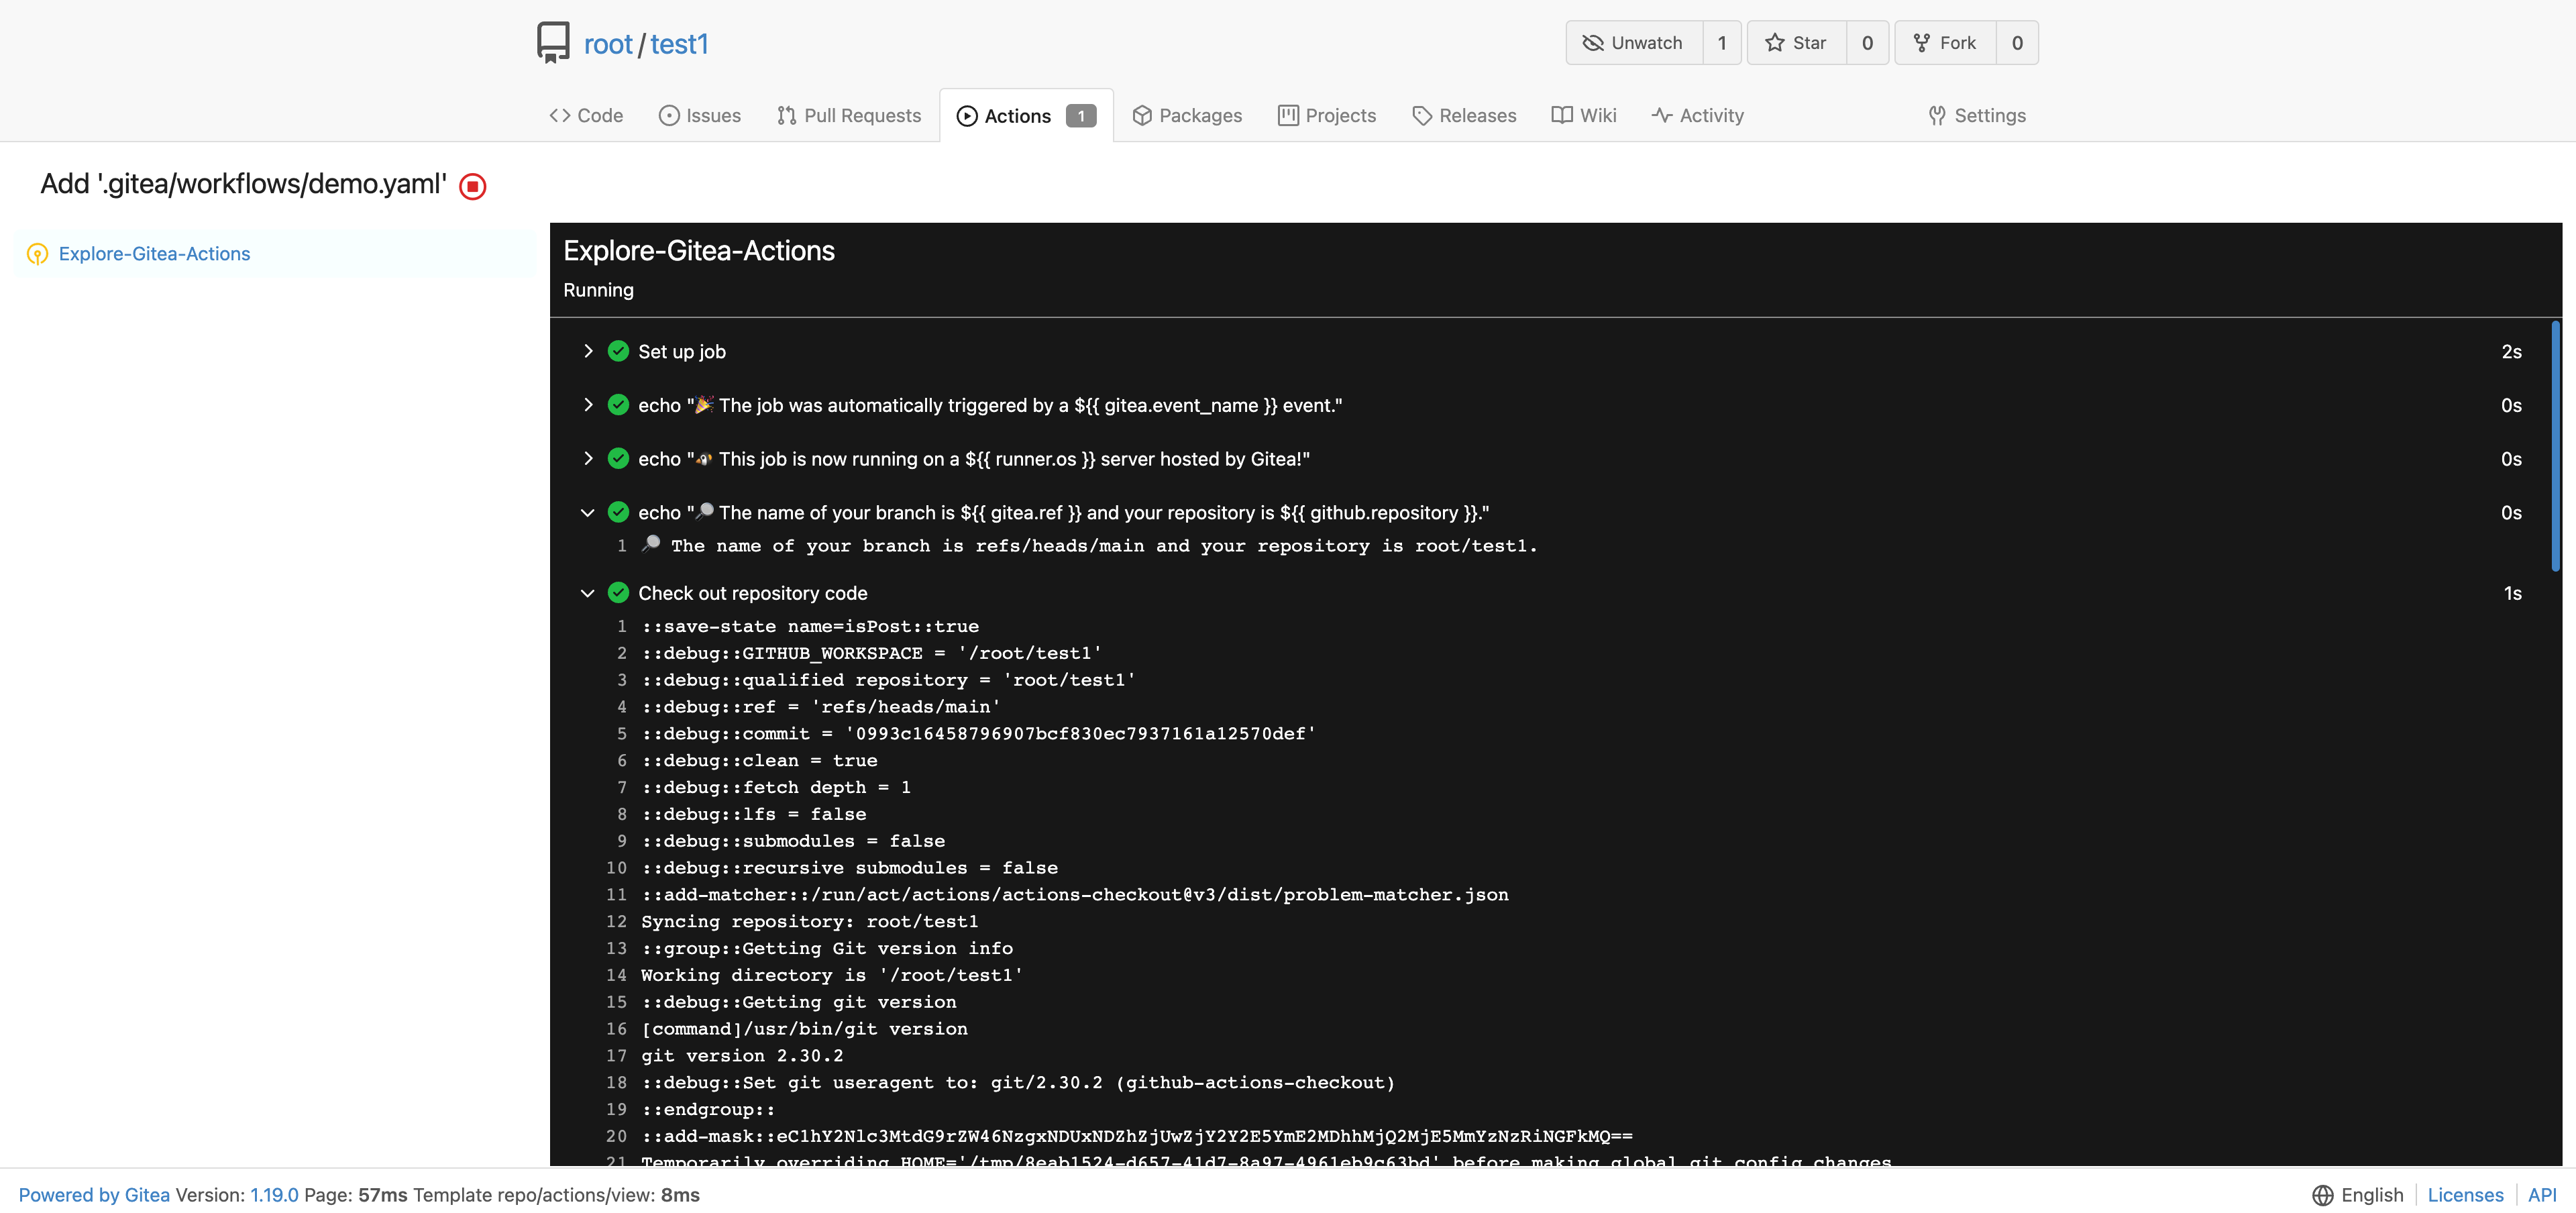
Great job! You have successfully started working with Actions.